You balanced the cooling. The glass-filled part still warps.
A flat part comes off the tool bowed, so you do the standard thing. You even out the cooling between the two halves of the mold. You bring the mold temperatures into balance. You add a little pack to hold the geometry, and you look at whether a rib would stiffen the axis that's moving. This is the warpage playbook. Every guide teaches it in that order, and every troubleshooting AI hands it back to you in the same order. You run the shots, you check the part, and it comes back with the same bow it had before.
And it works. On an unfilled part that warped because one side of the tool ran hotter than the other, cooling balance is the fix, and the rest of that list is the fix. That warp is a heat story: uneven cooling leaves uneven shrink, so evening out the heat evens out the part. As far as that goes, the playbook is right.
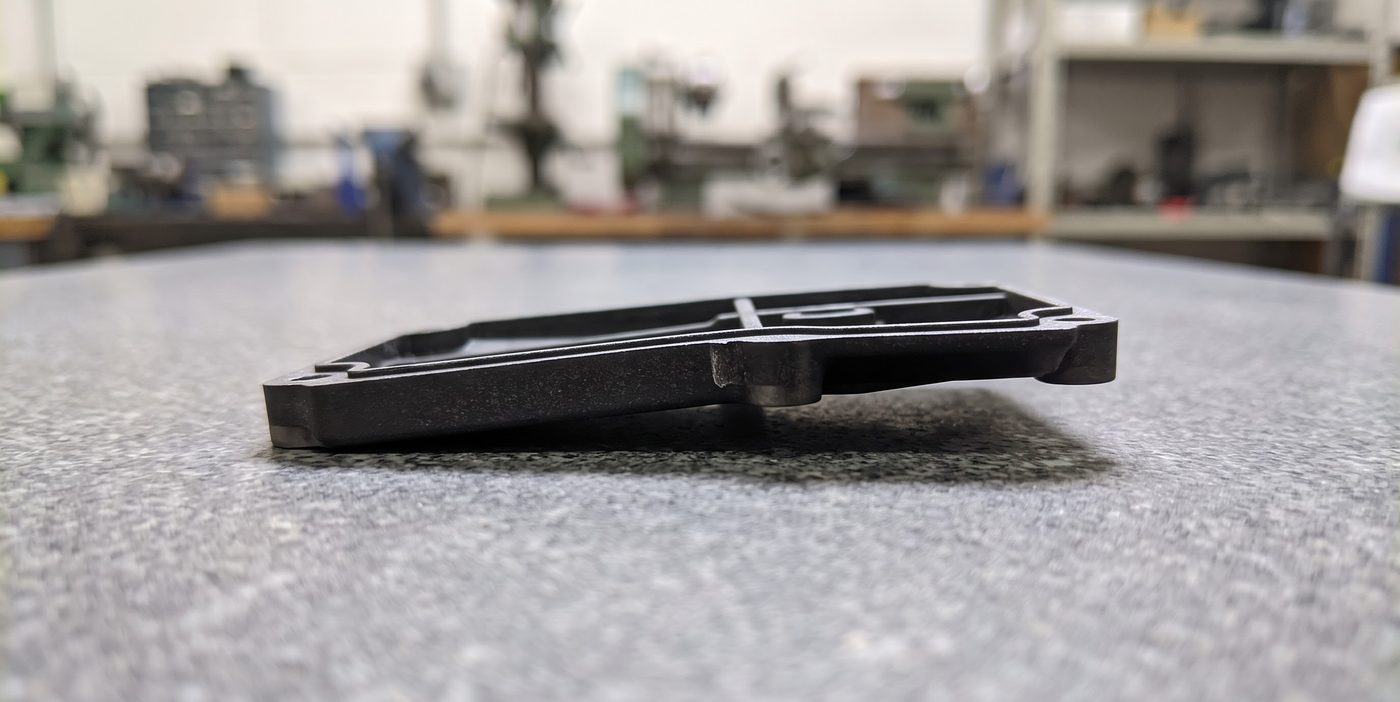
So before you turn another knob, look at where this part is actually lifting. Set it on the surface plate and see which corners come off the granite. The lift doesn't line up with the hot side of the tool. It lines up with the way the plastic flowed in. Sight down the part from the gate and follow the fill: the warp runs with it, not with the cooling layout. That's the tell. When the warp axis follows the flow and the material is glass-filled, you're not looking at a cooling problem. You're looking at the glass.
What the glass is doing
As the melt fills, the fibers line up with the flow, most strongly in the skin where the shear is highest. A fiber doesn't draw in the way the plastic around it does; it holds its length. So along the flow, where the fibers point, the part barely shrinks. Across the flow, where nothing is holding it, the plastic shrinks the way it always wanted to. Now the part is shrinking by different amounts in two directions at once, and a flat panel can't do that and stay flat. It pulls itself into a bow, or into a twist. Which one you get depends on how the fibers lie across the part, but the driver is the same. The shape isn't coming from where you cooled it. It's coming from where the fibers ended up.
Why cooling can't reach it
That's why the cooling work didn't land. You were correcting a heat gradient, and there wasn't one driving this. The shrink difference is built into the fiber layout, and cooling symmetry doesn't reach it. Packing harder doesn't reach it either; it can pin the dimension you're watching while the imbalance sits underneath, still loaded. And this is where a nuisance turns into a field failure. If you fight the warp by running one side of the tool deliberately cold, or by clamping the part flat while it sets, you don't erase the imbalance. You lock it in as stress. The part measures flat on the bench, then walks in the heat of assembly, or splits later at the corner you forced down.
What actually moves it
The lever that actually moves this is the one that set the fiber direction in the first place: where the gate is, and the path the fill takes across the part. Move the gate, change the fill pattern, and you change how the fibers lay down and how those two shrink directions fall on the part. On a tool that's already cut, the honest move is sometimes to build the counter-shape into the steel so the part springs back to flat, instead of forcing it flat after the fact. None of these is a knob you turn between shots; they're changes to the tool or the fill, and that's the point. The cause was decided the moment the part filled, not while it cooled. What you don't do is keep turning cooling and pack harder because those are the knobs in front of you. On this defect, turning them harder is how you bury the stress instead of removing it.
What went into the app
Mold Doctor looks at the part and the flow before it reaches for a setting, so a fiber-orientation warp doesn't come back with a cooling answer. Keeping those two apart is the whole point.